Construction Techniques
After touring hundreds of garden layouts throughout many parts of the country, we were amazed by the numerous construction techniques (some better than others) people have utilized for laying track, assembling buildings, electrical work etc. We observed and took notes on what we thought might work best for us in So California, realizing that we don’t have to account for frost heaving, snow, hail and excessive heat. Other than the occasional earthquakes, it seems like Southern California is a “relatively” easy climate and area for building a garden railroad.
The following design, construction techniques and installation methods are what seem to work well for us. We have also learned the hard way what doesn’t work well or things we would do differently in the future.
Track Installation
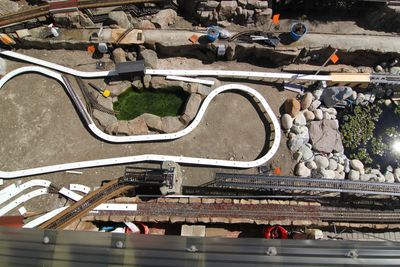
One of the best pieces of advice (for us) we received before any construction took place was keep track lines and loops simple and separate if we want to avoid future problems with electrical interfaces, collisions and ease of operations. The entire TMFRR track is laid on either a base of concrete, steel or redwood bridges, or Split Jaw PVC railbed.

Avoid future problems with solid track foundations.
We used various lengths of LGB and USA sectional track with split jaw rail joiners replacing all factory slip joiners for many years of worry free operations and solid electrical conductivity.

Split Jaw Rail clamps replaced all slip joiners.
Building on a Slope
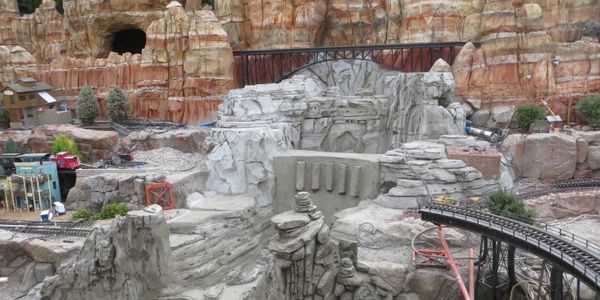
Expanding the layout to our fairly steep slope seemed to be an insurmountable challenge. However, after visiting a nearby layout built on a similar slope gave us fresh ideas and we soon expanded upwards. We hired a very talented local concrete sculpturing artist who had never worked on a garden railroad before (his area of expertise was concrete grottos, waterslides, ponds etc.) to construct rock walls, tunnels and a four level helix to raise the train up to the slope area. We would eventually hire him four more times as we added to the TMFRR. His work on our Utah-look mountain scene across the entire slope was the last construction project. He suggested and we added a fully functional dam to the river portion of the canyon.
The concrete construction of the Utah & Canyon Mountains.
Helixes
As in real life, a helix is built to raise and lower track elevations consistent with acceptable percentage degrees of inclines. Anything over a 2 1/2 - 3% incline creates challenges for most train consist and locomotives; adding curves increases dramatically the resistance and need for additional “pulling” power. Realizing that model trains have similar limitations and that we wanted to run trains across our 15-foot high and 60-foot wide Utah Mountains, we needed helixes on the north and south ends of the layout to gain over seven feet in elevation. As the elevation gain was way over 3-4% we decided to incorporate the LGB rack & cog locomotives and track.
The north helix is an average of 20% + grade and is made of sculptured concrete, using 4-foot diameter LGB curved brass track. If we had to do it over, we would use a minimum of five-foot diameter curves. The larger 3 truck LGB Steam Locomotive has difficulty making the tight 4 foot curves.
The south helix is a double track system that allows trains to gain over five feet in elevation and creates a space for our four sector Wizard of Oz scenes. Dan Hogue and staff from Eaglewings Ironcraft designed and built the two track metal helix. The inside track is 4 foot diameter while the outside is 5 foot.

Too Much Fun Railroad
Copyright © 2020 Too Much Fun Railroad - All Rights Reserved.
Powered by GoDaddy Website Builder
